SingaporeMotherhood | Preschooler & Up
November 2012
Craft with your child this year-end holiday!
The year-end school holidays are finally round the corner! Apart from travelling overseas, enrolling your children for enrichment classes or signing up for holiday camps, the holiday season is a perfect opportunity to spend quality time with your child.
[banner][/banner]
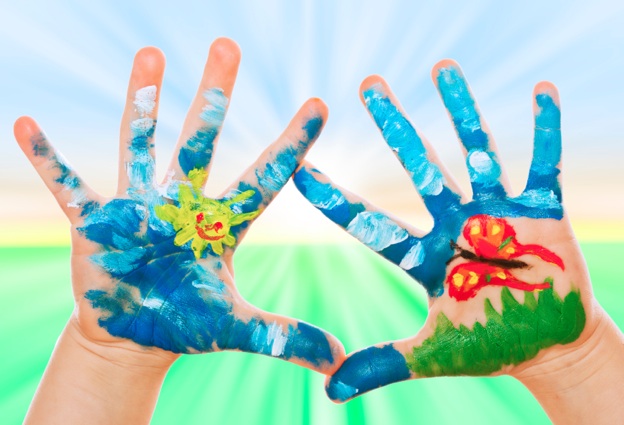
As the cooler season beckons, put on a Yuletide album, roll up your sleeves, and get crafting with your little ones. You’ll both enjoy precious bonding time, build hand-eye skills, and forge memories to treasure. Some of these inexpensive craft pieces can even be personalised as Christmas gifts for grandparents and loved ones.
1. Leaf and Vegetable Prints
Dried leaves with interesting shapes or vegetable cross-sections (Lady’s finger or Lotus root make visually arresting prints) can be dipped in paint and stamped on blank paper. Decorate homemade Christmas cards by using these natural stamps to create shapes or abstract patterns. You can also make wrapping paper by stamping these prints on a large sheet of mahjong paper. This project is simple enough for little toddlers to participate in. The examples in the picture below show a Christmas tree stamped using a dried leaf and an abstract pattern made from lotus roots.
2. Movable Collages
Young children enjoy “lift-the-flap” pictures and movable pictures. You can create a movable collage based on a theme which intrigues your child, for instance, a picture with vehicles, or one of a playground. Cut out pictures for the collage from magazines, tissue boxes or shopping catalogues. An older child can select and cut the pictures while a younger one can help to glue them in place. Colourful stickers may be used as well. By pasting only the top or bottom of a picture, you can create a flap which your child can lift to find a surprise underneath. Paper fasteners can also be used to allow a picture to move.
In the vehicle collage shown below, the left section of the bendy-bus is a flap that can be lifted to reveal passengers underneath while the right section is pivoted using a paper fastener to allow it to turn. The Looney Tunes characters in the playground collage were cut from a tissue box and paper fasteners were used to allow the see-saw and “rocking horses” to rock back and forth. Ribbons were used to make a movable swing.
 Clockwise from top: Playground collage, Lotus root prints, Vehicle collage, Christmas tree leaf print
3. Paper Box Toys
Cut or glue together boxes of various sizes to form the shape of a toy, and add bottle caps to make assorted knobs or wheels. Before assembling the boxes together, your child can help to paste wrapping paper on the boxes to cover the original print on the box, or paint over it. Your child can also help to decorate the toy by pasting the bottle caps using white craft glue.
Some of the toys shown here include characters from the In the Night Garden series with their home-made craft vehicles. Iggle Piggle’s boat and Upsy Daisy’s movable bed were made by removing one side of a box and cutting and pasting the remaining box into the correct shape, while Makka Pakka’s “Og-pog” (tricycle) was cut and pasted from a single piece of stiff cardboard to form a three-dimensional shape.
The chain of Cranky the Crane (from the Thomas the Tank Engine series) was made by threading a handphone chain through the bottom of a box. The crane’s boom is supported using the core of a roll of aluminium foil. The bendy buses were made from identical boxes joined together using a paper spring as a hinge.
The washing machine was made using a box and a yoghurt pot. The yoghurt pot was cut to fit the depth of the box and inserted into a circular hole cut out from the box. This allows the drum of the washing machine to turn, giving it a realistic effect. The cover of the yoghurt pot doubles up as the door to the washing machine while the cover of a tube of toothpaste was used to make the dial on the washing machine.
 From left to right: Upsy Daisy’s bed, Iggle Piggle’s boat, Makka Pakka’s “Og-pog”, Cranky the Crane, Washing machine, double- and single-deck bendy buses.
4. Designer Clothes
If your daughter is a budding fashion designer, she will enjoy making her own creations either for herself or her toys. Start with a plain T-shirt or dress, and embellish it using colourful buttons, lace, ribbons or other trimmings. If you are making clothes for your child’s soft-toys, consider decorating old baby clothes which may fit a large teddy bear. The dress of the pink teddy bear in the picture below was cut and sewn from an old adult T-shirt and decorated using recycled ribbon and a button. If your daughter is too young to sew, she can paste the trimmings on using fabric glue first, and you can help her to sew them in place once the glue dries.
Shops like Golden Dragon and Spotlight have a wide selection of beads, ribbons, lace and iron-on patterns.
You can also get your child to personalise T-shirts as Christmas gifts by drawing or painting on them using fabric markers, crayons or paints. These are available at Art Friend.
If drawing is not your forte, opt for iron-on pictures instead. Simply choose a nice digital picture or family photograph and print it on special iron-on paper. This is available from IT shops selling printer supplies at Funan Centre or Sim Lim Square. The picture can then be transferred onto a plain T-shirt.
An older girl may enjoy knitting a scarf for her teddy bear using knitting looms which are available at major toy stores or craft shops. For a more ambitious project, give an older child a pair of knitting needles to knit a scarf for your next winter holiday. Knitting lessons are conducted at craft shops like Golden Dragon and Spotlight.
5. Pom-pom Toys
Simple soft toys can be made using pom-poms. Small, ready-made pom-poms are available in craft kits for a younger child to glue together to form the head, body and limbs of an animal.
An older child with more patience can customise his or her own pom-pom by either winding yarn around a plastic mould (available from Golden Dragon) or a home-made paper frame. Just search the Internet for instructions on how to make pom-poms. One can be found here. A small pom-pom toy can be made into a keychain or charm for hanging on a handphone. Plastic movable eyes and felt limbs can be pasted onto the pom-pom to transform it into an animal, like the blue “porcupine” shown in the photo below.
6. Sock Puppets
Sock puppets are easy to make and play with. Your child will enjoy seeing his or her creation come to live during story or nursery rhyme time. Simply choose a pair of socks of the desired colour and let your child paste on buttons for the eyes. Plastic movable eyes can also be used instead of buttons. Just be sure to secure them tightly if your child has a tendency to put toys into his or her mouth. Yarn can be sewn on to make the hair of a puppet, and the mouth may be drawn on using fabric markers or sewn on. In the example below, fake orange “pussy willow” was used to make the beaks of the two “birds”, which are supposed to be “Peter” and “Paul” from the nursery rhyme “Two little black birds”.
 Clockwise from left: Pink teddy with homemade dress, Hand-drawn Chuggington singlet, Brown teddy with homemade scarf, Sock puppet birds and Pom-pom “porcupine”.
Although homemade craft toys may not be as sturdy as or look as nice as store-bought ones, the process of making them with your child provides hours of bonding time and fun. Craft work not only helps to develop the creative side of your child, it also brings out a sense of pride and accomplishment when your child sees his or her art piece come to life.
All craft projects featured in this article were made by the writer for or with her pre-schooler.
All content from this article, including images, cannot be reproduced without credits or written permission from SingaporeMotherhood.
Follow us on Facebook, Instagram, and Telegram for the latest article and promotion updates.